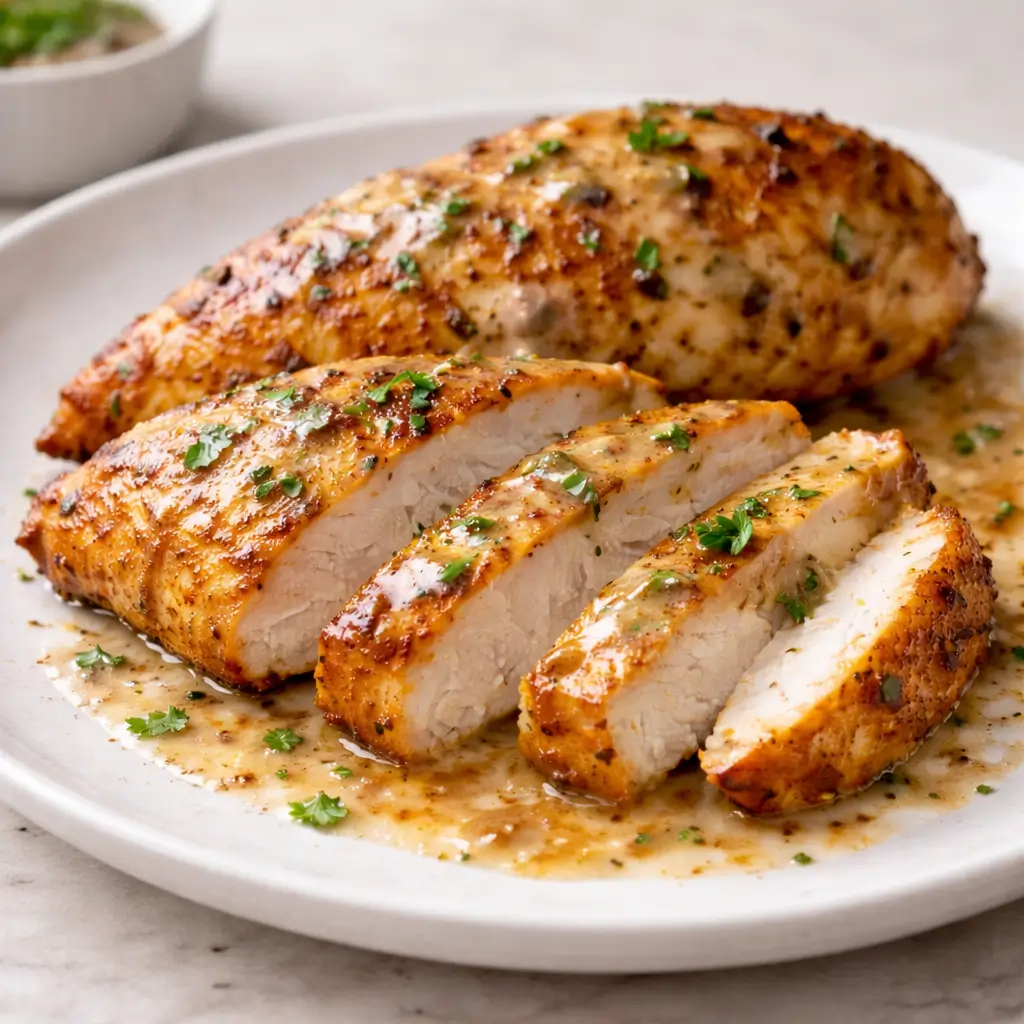
Air Fryer Chicken Breast is one of the easiest ways to make a healthy, satisfying meal without sacrificing flavor or texture. When cooked properly, it becomes incredibly juicy inside, lightly crisp outside, and perfectly seasoned throughout. This method eliminates the common problem of dry chicken while also reducing cooking time and cleanup.
Whether you need a quick weeknight dinner, a protein for meal prep, or a versatile base for salads and bowls, this recipe delivers consistent results every time.
Why You’ll Love This Recipe
Air frying transforms simple chicken breasts into something truly delicious. Here is why this method works so well:
- Fast cooking time — ready in under 20 minutes
- Minimal ingredients — pantry-friendly seasoning
- Healthier option — less oil than pan-frying
- Consistent results — even cooking with circulating heat
- Versatile use — great for slicing, shredding, or serving whole
- Perfect for meal prep — reheats beautifully without drying out
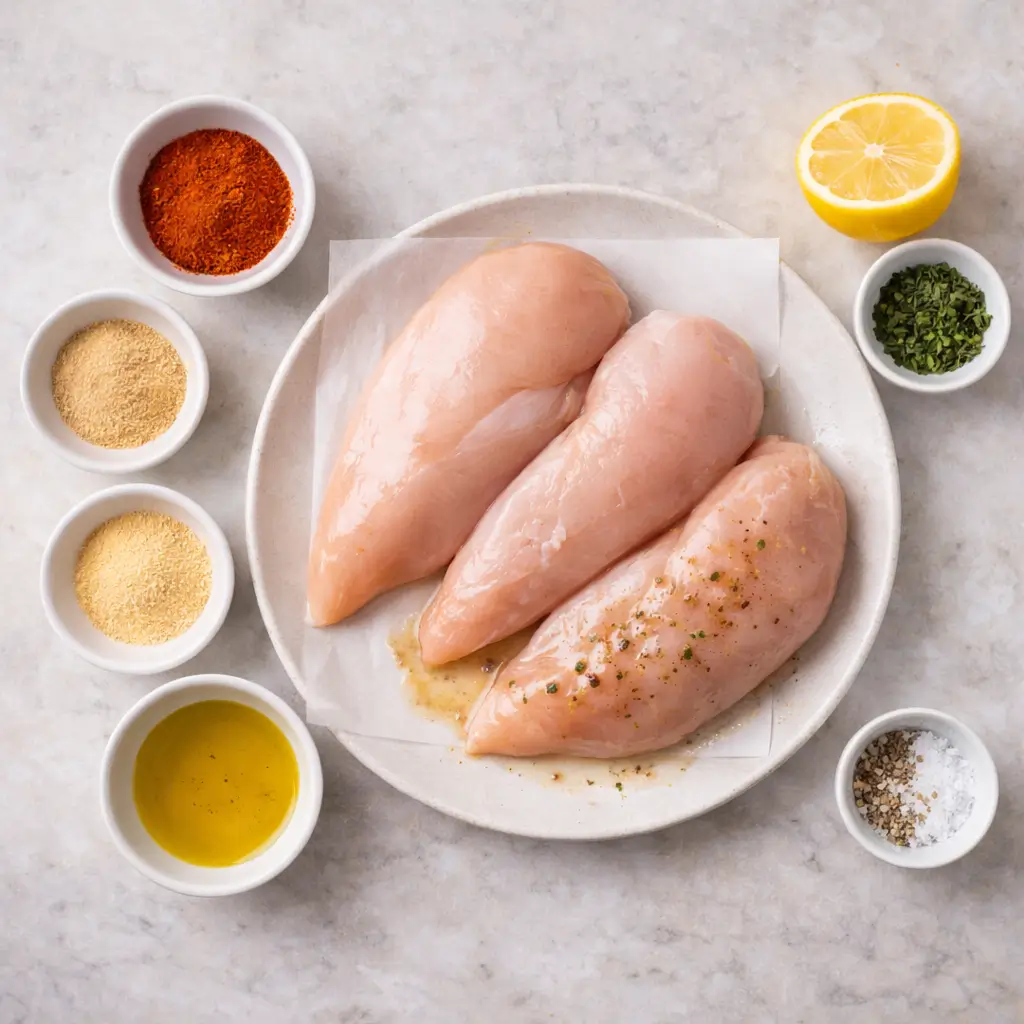
Ingredients
This recipe uses simple ingredients that enhance the natural flavor of the chicken.
| Ingredient | Quantity | Purpose |
|---|---|---|
| Boneless, skinless chicken breasts | 2 medium | Main protein |
| Olive oil | 1 tablespoon | Helps seasoning adhere |
| Paprika | 1 teaspoon | Adds color and mild smokiness |
| Garlic powder | 1 teaspoon | Savory depth |
| Onion powder | ½ teaspoon | Balanced flavor |
| Salt | ¾ teaspoon | Enhances taste |
| Black pepper | ½ teaspoon | Light heat |
| Optional: dried thyme or parsley | ½ teaspoon | Fresh herbal note |
Choosing the Right Chicken Breasts
Chicken breast size affects cooking time more than most people realize.
Ideal thickness:
Choose pieces that are even in thickness, about ¾ to 1 inch thick.
If they are too thick:
- Pound gently with a meat mallet
- Or slice horizontally to create cutlets
Uniform thickness ensures:
- Even cooking
- Better moisture retention
- No dry edges
How the Air Fryer Makes Chicken Juicy
Unlike baking, an air fryer circulates hot air rapidly around the food. This creates:
- A light exterior crust that seals moisture
- Faster cooking that prevents over-drying
- Even heat distribution
- Controlled evaporation
Because the chicken cooks quickly, the internal juices stay trapped rather than escaping slowly as in oven roasting.
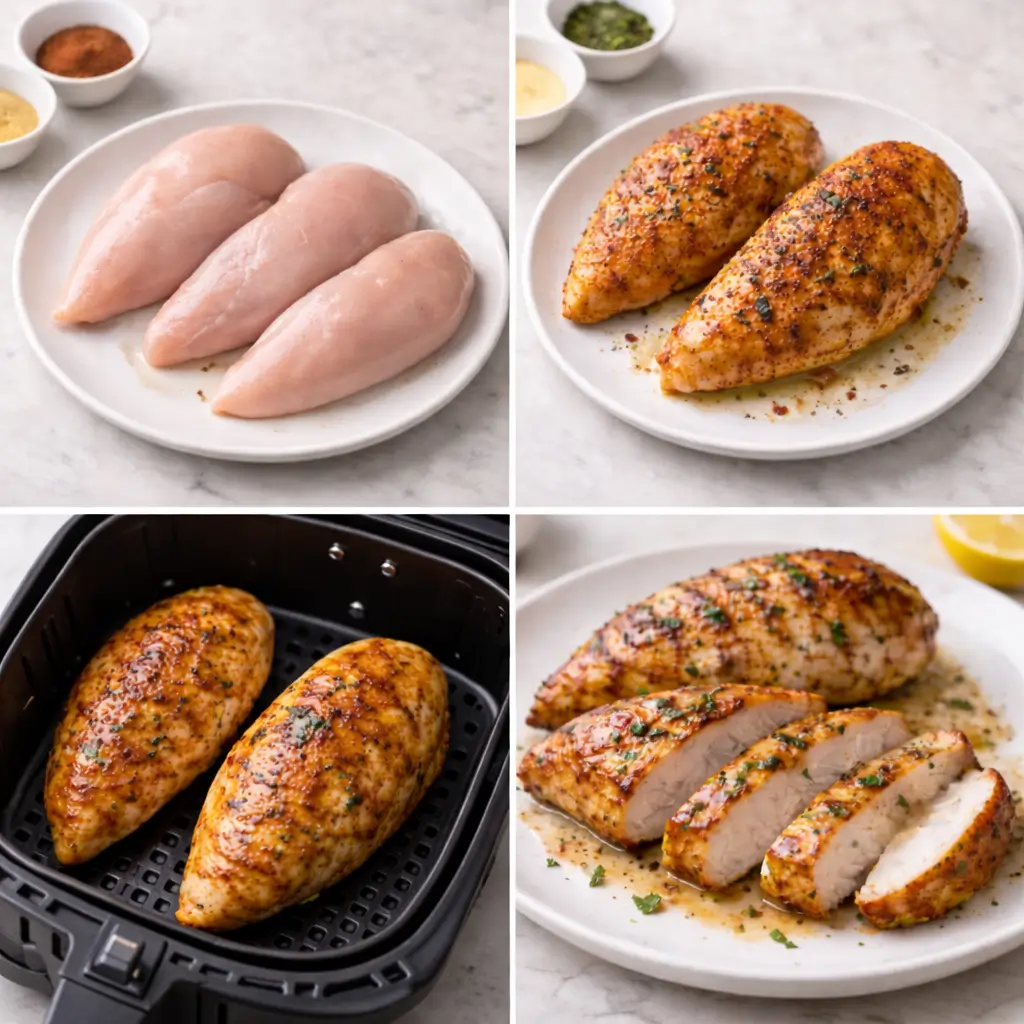
Step-by-Step Instructions
Step 1 — Prepare the Chicken
Pat the chicken breasts dry using paper towels.
Removing surface moisture helps seasoning stick and improves browning.
If needed, lightly pound to even thickness.
Step 2 — Add Oil
Drizzle olive oil over the chicken.
Rub evenly to coat all surfaces.
This thin layer helps:
- Seasoning adhere
- Browning develop
- Moisture remain locked inside
Step 3 — Season Generously
Combine paprika, garlic powder, onion powder, salt, pepper, and herbs.
Sprinkle evenly over both sides.
Press gently to help seasoning bind.
Do not under-season — chicken breast needs bold flavor.
Step 4 — Preheat the Air Fryer
Set the air fryer to:
Temperature: 375°F (190°C)
Preheat time: 3–4 minutes
Preheating ensures immediate cooking and better texture.
Step 5 — Arrange Chicken Properly
Place chicken inside the basket in a single layer.
Do not stack or overlap.
Air must circulate freely around each piece.
Step 6 — Cook
Cook for:
- 7–9 minutes per side
- Flip halfway through
Cooking time varies depending on thickness.
Step 7 — Check Internal Temperature
Use a meat thermometer to confirm doneness.
Target temperature: 165°F (74°C)
This guarantees:
- Safe consumption
- Maximum juiciness
- No overcooking
Step 8 — Rest Before Slicing
Remove chicken and let rest 5 minutes.
Resting allows juices to redistribute inside the meat.
Skipping this step causes moisture loss when slicing.
The Secret to Preventing Dry Chicken
The most common mistake is overcooking.
Chicken breast contains very little fat.
Even 2 extra minutes can cause dryness.
Always rely on temperature, not guesswork.
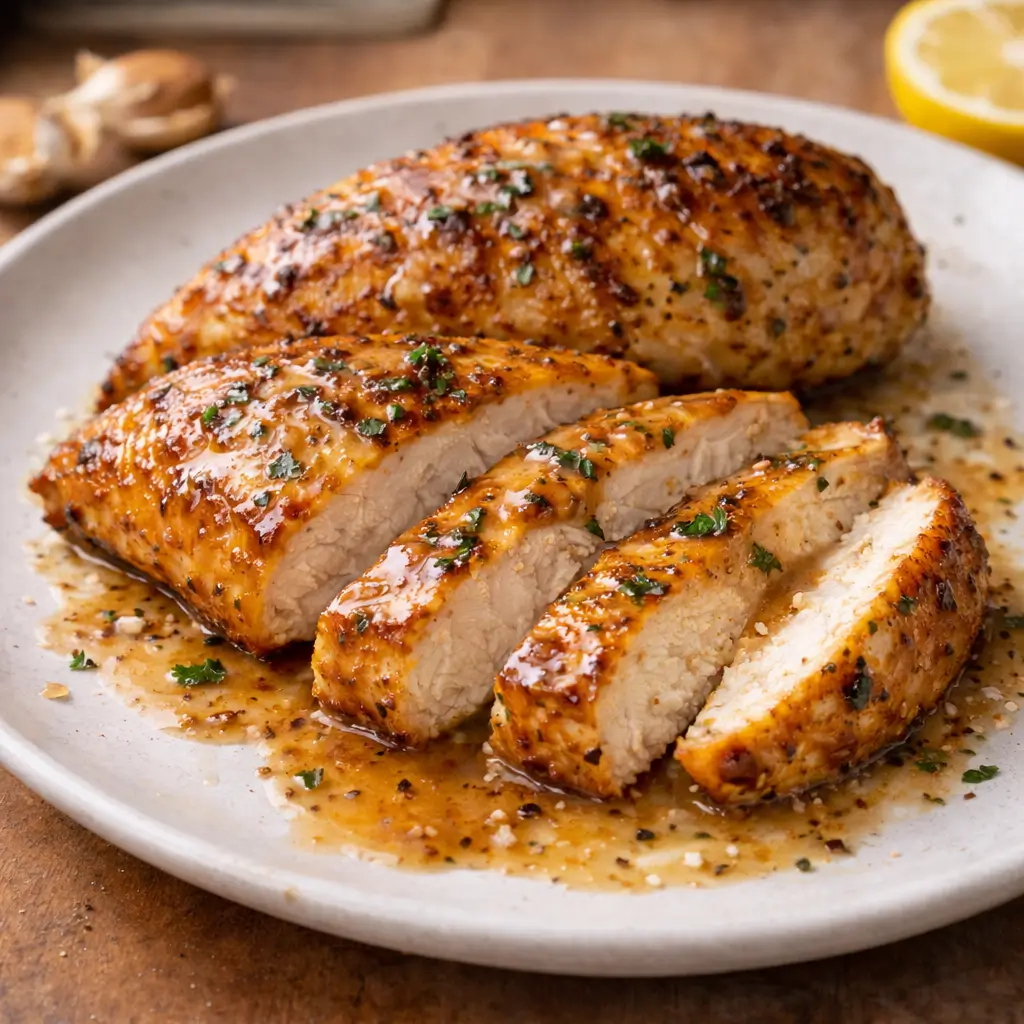
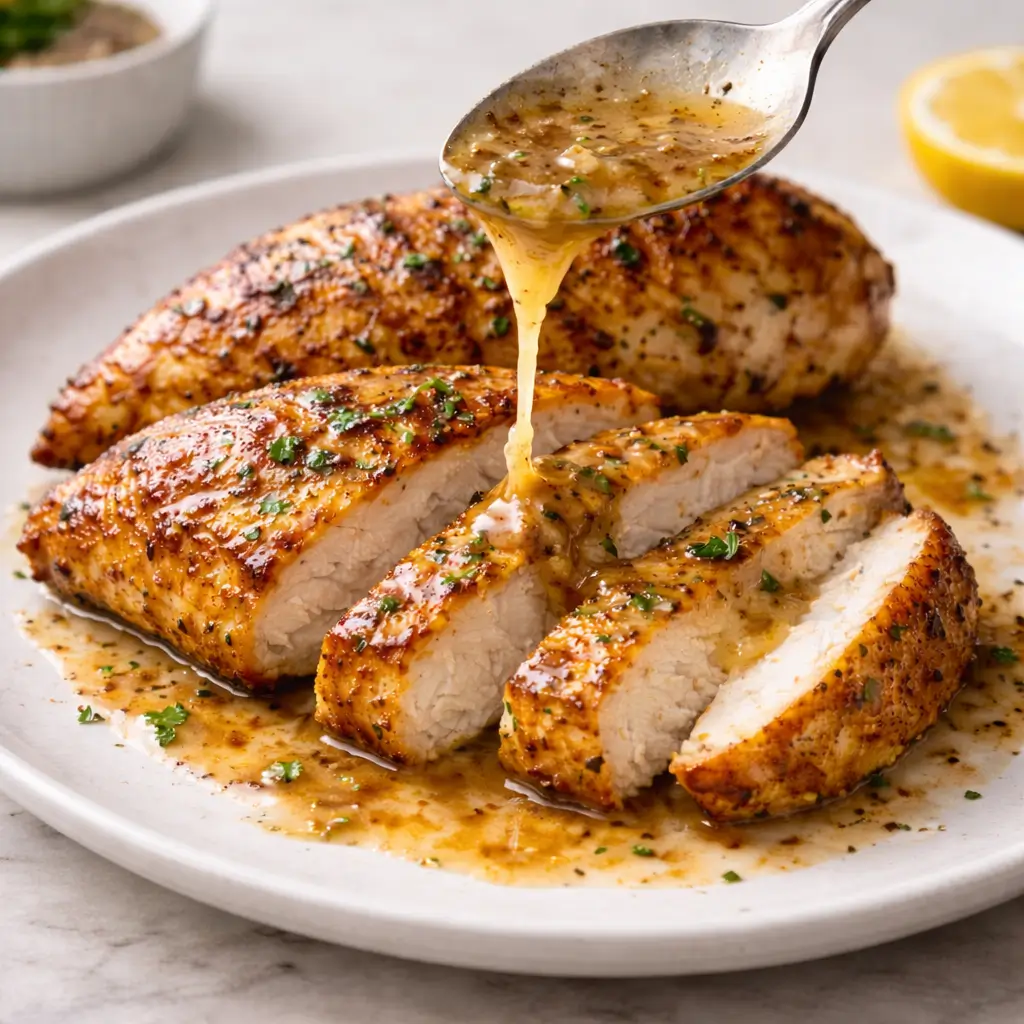
Optional Sauce Ideas
You can serve the chicken plain or enhance it with a simple sauce.
Light Garlic Butter
Melt butter with minced garlic and drizzle lightly.
Lemon Herb Finish
Add fresh lemon juice and chopped parsley.
Creamy Yogurt Sauce
Mix Greek yogurt, lemon, salt, and garlic powder.
Honey Mustard Glaze
Whisk mustard, honey, and olive oil.
Each option adds flavor without overpowering the chicken.
How to Slice for Maximum Tenderness
Always slice against the grain.
This shortens muscle fibers and makes each bite softer.
Look for the direction of the lines in the meat, then cut perpendicular.
Meal Prep Benefits
This recipe is ideal for preparing protein ahead of time.
Storage
Refrigerate in airtight container up to 4 days.
Freezing
Freeze sliced portions for up to 2 months.
Reheating Tip
Reheat gently at 325°F or microwave covered to retain moisture.
Ways to Use Air Fryer Chicken Breast
This chicken is incredibly versatile.
Serve With
- Roasted vegetables
- Rice or quinoa
- Mashed potatoes
- Steamed greens
Add To
- Salads
- Wraps
- Sandwiches
- Pasta
- Grain bowls
Shred For
- Tacos
- Soups
- Casseroles
- Meal prep lunches
Flavor Variations
Once you master the base recipe, you can customize endlessly.
Italian Style
Add oregano, basil, and parmesan.
Smoky BBQ
Use smoked paprika and chili powder.
Mediterranean
Add lemon zest, garlic, and oregano.
Cajun
Use Cajun seasoning blend for bold spice.
Common Mistakes to Avoid
1. Skipping Preheating
Cold air fryer leads to uneven cooking.
2. Overcrowding the Basket
Crowding prevents airflow and causes steaming instead of roasting.
3. Not Drying the Chicken
Moisture blocks browning.
4. Cooking Too Long
Leads directly to dryness.
5. Cutting Immediately
Juices escape before resting.
Nutrition Overview
Air fryer cooking requires very little oil, making this a lean, high-protein option.
| Nutrient | Approximate Amount |
|---|---|
| Calories | 220–260 |
| Protein | 35–40g |
| Fat | 6–8g |
| Carbohydrates | 0g |
| Sodium | Depends on seasoning |
This makes it ideal for:
- High-protein diets
- Low-carb eating
- Balanced meal planning
Why This Method Beats Oven Baking
| Air Fryer | Oven |
|---|---|
| Faster cooking | Longer cook time |
| Better moisture retention | Greater risk of drying |
| Crisp exterior | Often softer texture |
| Energy efficient | Uses more heat |
| No large preheat | Full oven preheat required |
Equipment Tips
Best Air Fryer Size
A 4–6 quart model works best for 2–3 chicken breasts.
Use a Thermometer
This is the single most important tool for success.
Avoid Foil on Bottom
It blocks airflow and prevents even cooking.
Scaling the Recipe
You can easily cook more portions.
Just remember:
- Cook in batches if needed
- Never stack chicken
- Maintain airflow space
Make It a Complete Meal
Pair with simple sides to create balanced dinners:
- Garlic green beans
- Roasted sweet potatoes
- Couscous salad
- Avocado tomato salad
- Brown rice with herbs
Frequently Asked Questions
Can I Cook Frozen Chicken?
Yes, but thawing first produces better seasoning and texture.
Do I Need to Flip the Chicken?
Flipping ensures even browning.
Can I Marinate Instead?
Absolutely. Marinate up to 8 hours for deeper flavor.
Why Is My Chicken Tough?
It likely cooked too long or was not rested.
Final Thoughts
Air Fryer Chicken Breast proves that simple ingredients and proper technique can create a meal that is both healthy and deeply satisfying. By focusing on even thickness, balanced seasoning, precise cooking temperature, and resting time, you can achieve tender, flavorful chicken every single time.
This recipe becomes not just a dinner solution, but a reliable kitchen staple — one you can adapt, scale, and enjoy throughout the week in countless ways.
Once you try it, you may never go back to baking chicken breasts again.