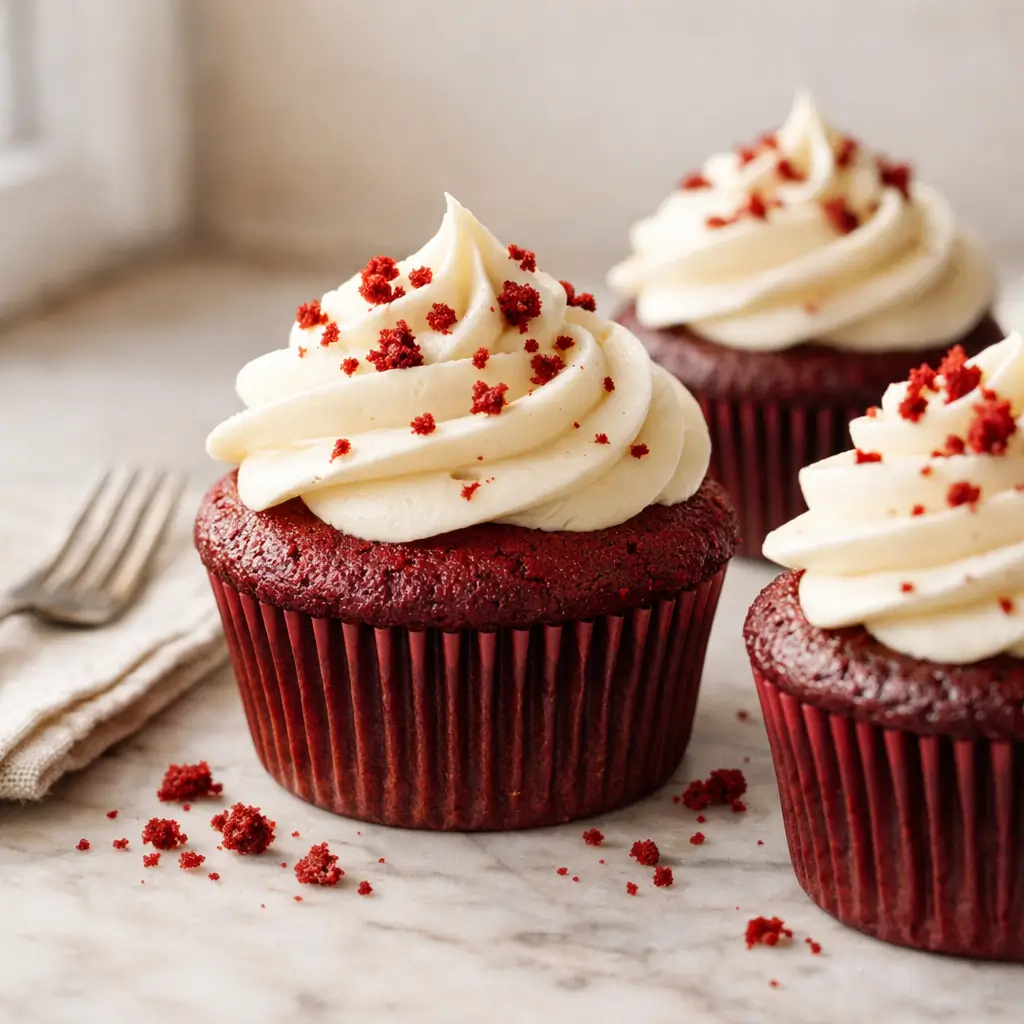
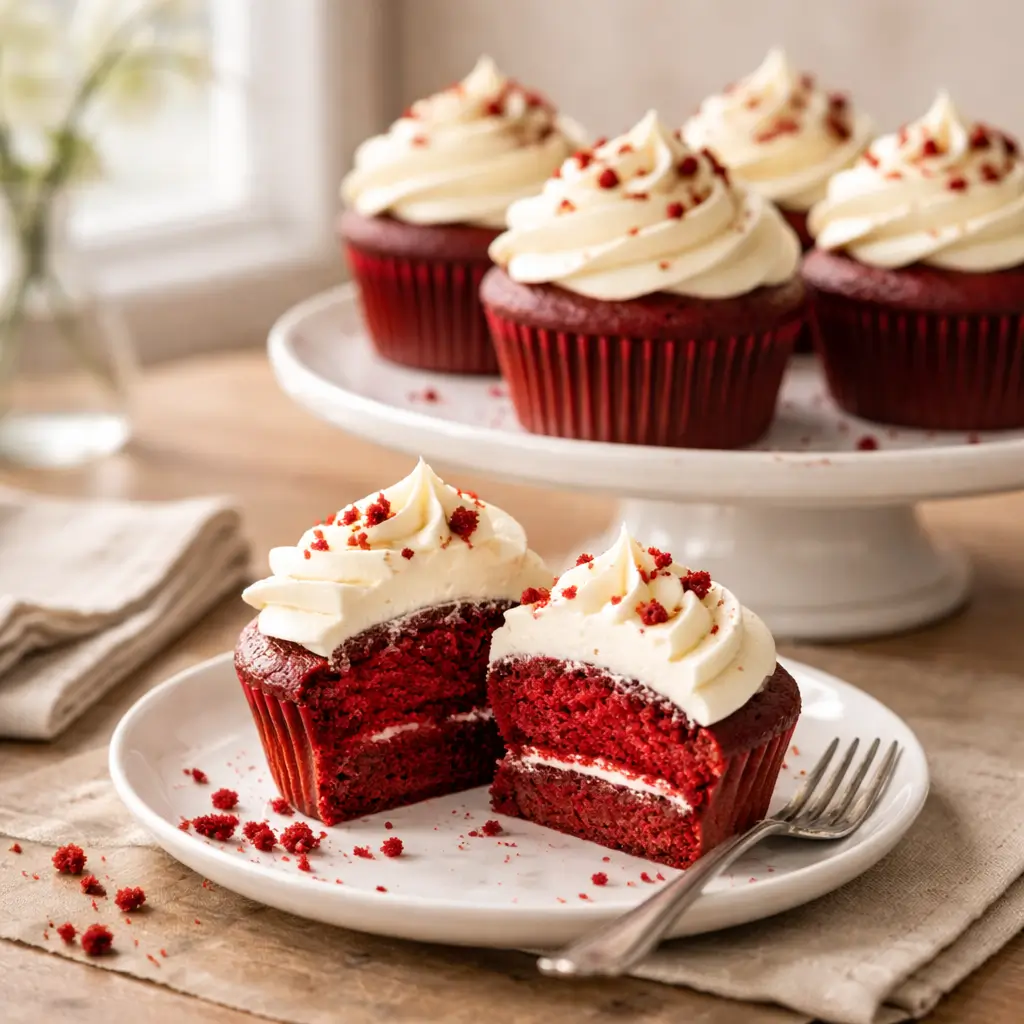
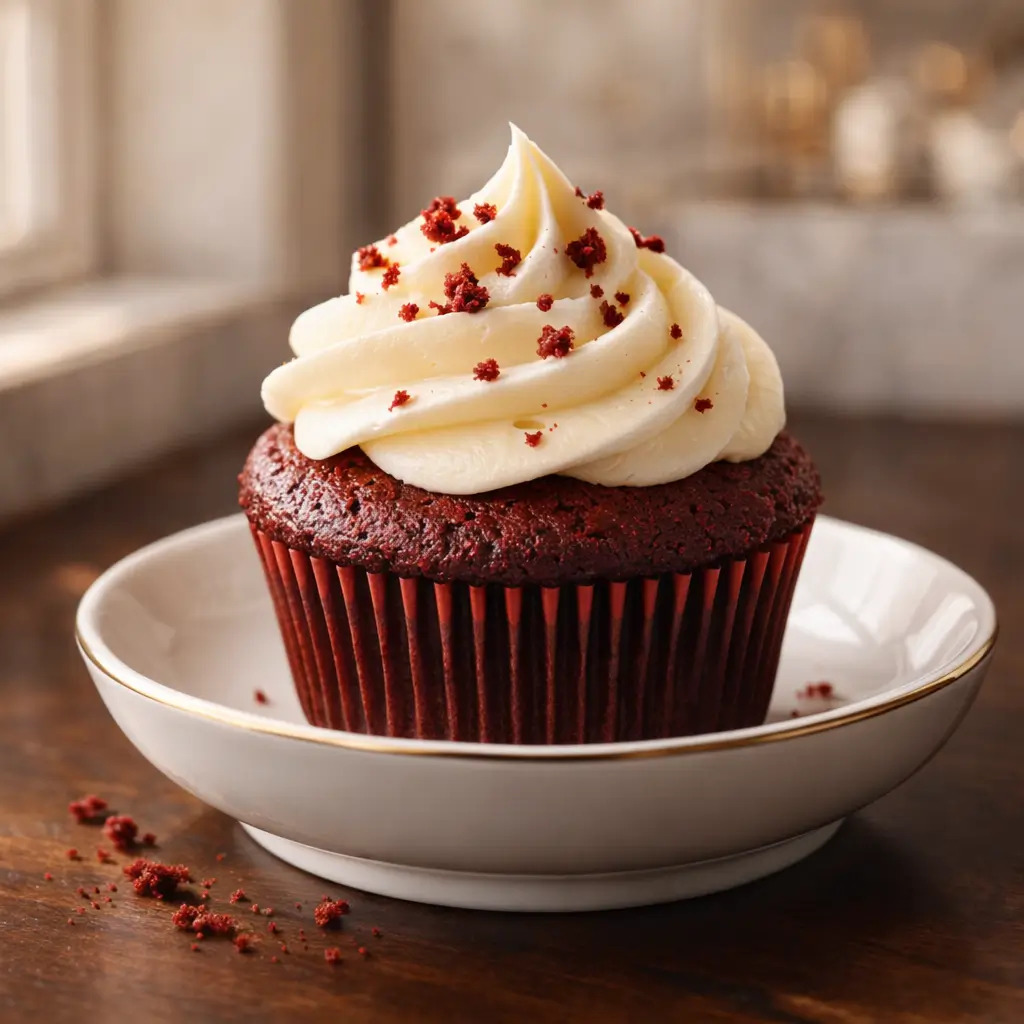
Red velvet cupcakes are more than just a dessert. They are a classic symbol of elegance, indulgence, and celebration. These beautiful crimson treats combine a subtle cocoa flavor with a delicate tang from buttermilk, all topped with creamy, luscious cream cheese frosting. Whether for birthdays, holidays, romantic dinners, or simple everyday joy, red velvet cupcakes never fail to impress.
In this complete guide, you will learn everything about making perfect red velvet cupcakes at home. You will discover the history, key ingredients, baking science, step-by-step method, expert tips, variations, storage tricks, and serving ideas. By the end, you will feel confident, inspired, and fully prepared to bake bakery-quality cupcakes in your own kitchen.
Why Red Velvet Cupcakes Are So Special
Red velvet cupcakes stand out from ordinary chocolate or vanilla cupcakes. Their flavor is subtle yet rich. Their texture is incredibly soft and tender. Their deep red color makes them visually striking and irresistible.
Unlike standard chocolate cupcakes, red velvet contains only a small amount of cocoa powder. This keeps the flavor light rather than heavy. Buttermilk adds moisture and a slight tanginess that balances the sweetness beautifully. Vinegar and baking soda react together, creating a soft crumb with a fine, delicate texture.
Then comes the cream cheese frosting. Its creamy, slightly tart taste pairs perfectly with the mild cocoa flavor. Together, they create a harmonious contrast that keeps every bite exciting and satisfying.
The Story Behind Red Velvet Cake
The origins of red velvet cake are widely debated. Some food historians trace it back to the Victorian era, when cocoa powder naturally reacted with acidic ingredients, producing a reddish hue. Others believe the cake became popular in the United States in the mid-20th century.
One famous version of the story links red velvet cake to the Waldorf Astoria Hotel in New York. According to legend, a guest loved the cake so much that she requested the recipe. The hotel allegedly charged her a large fee. In response, she shared the recipe publicly, making red velvet widely known.
Regardless of its true origin, red velvet has become a beloved classic in bakeries, restaurants, and home kitchens worldwide.
Key Ingredients That Make the Perfect Red Velvet Cupcakes
Every great recipe starts with the right ingredients. Each component plays a crucial role in flavor, texture, and appearance.
All-Purpose Flour
Flour provides structure to the cupcakes. Using all-purpose flour gives the perfect balance between softness and stability. Too much flour would make them dense. Too little would make them fragile.
Unsweetened Cocoa Powder
Cocoa powder adds a gentle chocolate note without overpowering the red velvet character. A small amount is enough to enhance depth and richness.
Granulated Sugar
Sugar sweetens the cupcakes and helps retain moisture. It also contributes to a tender crumb and a beautiful golden edge.
Unsalted Butter
Butter gives richness and flavor. It also creates a smooth batter that bakes evenly.
Eggs
Eggs provide structure, stability, and moisture. They help bind all ingredients together.
Buttermilk
Buttermilk is essential for an authentic red velvet texture. It adds tanginess and keeps the cupcakes soft and moist.
Red Food Coloring
Red food coloring gives these cupcakes their iconic appearance. Gel food coloring works best because it produces a deep, vibrant red without thinning the batter.
Baking Soda and Vinegar
These two ingredients react together, creating lightness and lift. This reaction also contributes to the classic velvety texture.
Vanilla Extract
Vanilla enhances the overall flavor and balances the cocoa and buttermilk.
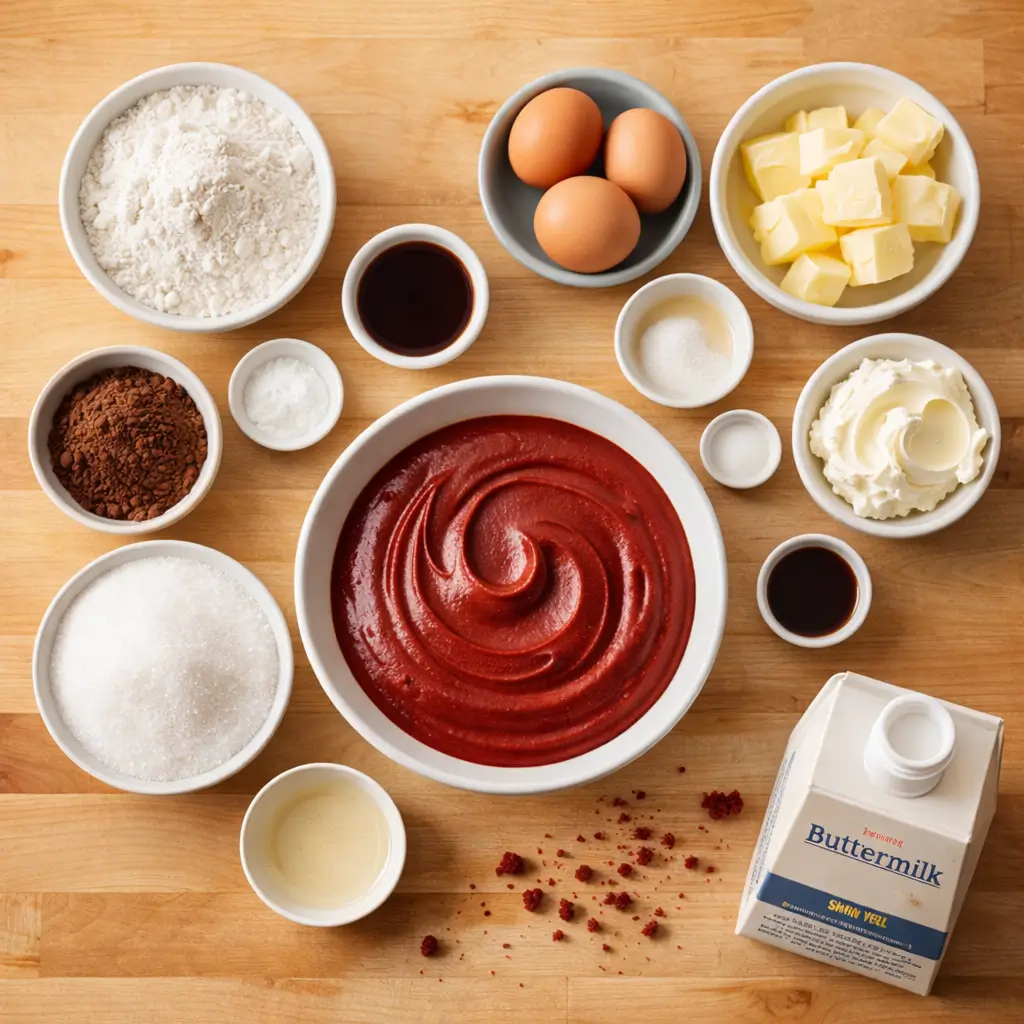
Ingredients — Red Velvet Cupcakes (12 cupcakes)
For the Red Velvet Cupcakes
- 1 ½ cups (190 g) all-purpose flour
- 1 ½ tablespoons (10 g) unsweetened cocoa powder
- 1 teaspoon baking soda
- ½ teaspoon fine salt
- ½ cup (115 g) unsalted butter, softened
- 1 cup (200 g) granulated sugar
- 2 large eggs, room temperature
- 1 teaspoon pure vanilla extract
- 1 tablespoon (15 ml) red gel food coloring
- ¾ cup (180 ml) buttermilk, room temperature
- 1 teaspoon white vinegar
For the Cream Cheese Frosting
- 8 oz (225 g) full-fat cream cheese, softened
- ½ cup (115 g) unsalted butter, softened
- 3 cups (360 g) powdered sugar, sifted
- 1 teaspoon pure vanilla extract
- Pinch of salt (optional, but recommended)
Optional Garnish
- Red velvet crumbs for topping
- White chocolate shavings (optional)
- Edible gold dust or sprinkles (optional)
The Cream Cheese Frosting That Steals the Show
No red velvet cupcake is complete without cream cheese frosting. This topping is creamy, silky, and slightly tangy.
Cream Cheese
Full-fat cream cheese provides richness and structure. It should be softened before mixing for a smooth texture.
Unsalted Butter
Butter helps stabilize the frosting while adding depth and creaminess.
Powdered Sugar
Powdered sugar sweetens the frosting and helps it hold its shape when piped.
Vanilla Extract
A touch of vanilla adds warmth and balance to the frosting.
Step-by-Step Method for Perfect Red Velvet Cupcakes
Following a clear method ensures consistent, professional results every time.
Step 1: Prepare Your Ingredients
Preheat your oven to 350°F (175°C). Line a cupcake pan with paper liners. Measure all ingredients carefully. This step prevents mistakes and makes baking smoother.
Step 2: Mix the Dry Ingredients
In a bowl, whisk together flour, cocoa powder, baking soda, and salt. This distributes the leavening evenly and prevents lumps.
Step 3: Cream Butter and Sugar
In a separate bowl, beat butter and sugar together until light and fluffy. This incorporates air, making the cupcakes soft and tender.
Step 4: Add Eggs and Vanilla
Beat in the eggs one at a time. Then add vanilla extract. The mixture should look smooth and slightly glossy.
Step 5: Add Red Food Coloring
Stir in the red food coloring until the batter turns a deep, vibrant red.
Step 6: Alternate Wet and Dry Ingredients
Gradually add the dry mixture and buttermilk in small portions, alternating between them. Mix gently until just combined.
Step 7: Add Vinegar
Stir in vinegar at the very end. This activates the baking soda and enhances the cupcake’s texture.
Step 8: Fill and Bake
Spoon the batter into cupcake liners, filling each about two-thirds full. Bake for 18–22 minutes until a toothpick comes out clean.
Step 9: Cool Completely
Let the cupcakes cool in the pan for 5 minutes, then transfer them to a wire rack. Frost only when fully cooled.

Making the Cream Cheese Frosting
Beat softened cream cheese and butter together until smooth. Gradually add powdered sugar, mixing on low speed. Add vanilla extract and beat until fluffy and spreadable.
For a professional bakery look, use a piping bag with a star tip to create tall, elegant swirls.
Expert Tips for Bakery-Quality Results
These tips will help you achieve perfect cupcakes every time.
Use Room Temperature Ingredients
Cold ingredients can cause the batter to curdle. Let butter, eggs, and buttermilk sit out before baking.
Do Not Overmix
Overmixing develops gluten and makes cupcakes dense. Mix just until combined.
Choose Gel Food Coloring
Gel produces a richer color without adding extra liquid.
Check Doneness Carefully
Avoid overbaking. Remove cupcakes as soon as a toothpick comes out clean or with a few moist crumbs.
Delicious Variations of Red Velvet Cupcakes
You can customize this classic recipe in many creative ways.
Red Velvet Cheesecake Cupcakes
Add a small dollop of cheesecake filling in the center before baking.
Red Velvet with White Chocolate Frosting
Swap cream cheese frosting for white chocolate buttercream for a sweeter taste.
Mini Red Velvet Cupcakes
Use a mini cupcake pan for bite-sized treats perfect for parties.
Red Velvet Cupcakes with Raspberry Filling
Inject a spoonful of raspberry jam into the center for a fruity twist.
How to Store Red Velvet Cupcakes
Proper storage keeps your cupcakes fresh and delicious.
At Room Temperature
Store unfrosted cupcakes in an airtight container for up to 2 days.
In the Refrigerator
Frosted cupcakes should be refrigerated. They stay fresh for up to 5 days.
In the Freezer
Freeze unfrosted cupcakes for up to 3 months. Thaw before frosting.
Serving Ideas for Every Occasion
Red velvet cupcakes are versatile and elegant.
Serve them on a white cake stand for weddings. Arrange them on a tiered platter for birthdays. Pair them with coffee or tea for an afternoon dessert. Add gold or silver sprinkles for festive holidays.
Common Mistakes to Avoid
Avoid these pitfalls for the best results.
Do not skip buttermilk. Do not use liquid food coloring. Do not frost warm cupcakes. Do not overfill liners. Do not overbake.
Why This Recipe Works So Well
This recipe balances moisture, flavor, and texture perfectly. The combination of buttermilk, vinegar, and baking soda creates a soft crumb. The small amount of cocoa enhances depth. Cream cheese frosting adds richness and contrast.
Final Thoughts
Red velvet cupcakes are timeless, elegant, and utterly delicious. With the right ingredients, careful technique, and a little patience, you can create bakery-quality cupcakes at home. Whether for special occasions or simple treats, this recipe will always impress.
Bake with confidence. Enjoy every bite. Share with loved ones. Red velvet cupcakes truly make life sweeter.