
Dill Pickle Ranch Smash Chicken Tacos are the ultimate flavor-bomb weeknight dinner — juicy smashed chicken thighs seasoned with ranch, topped with tangy dill pickle slices, and tucked into a warm flour tortilla. The combination of crispy-edged chicken, creamy ranch drizzle, and briny pickle punch is unexpected and completely addictive. These come together in under 30 minutes and are guaranteed to become a new household obsession.
Whether you’re cooking for a busy weeknight or a relaxed weekend dinner, this Dill Pickle Ranch Smash Chicken Tacos delivers every single time. Keep reading for everything you need — ingredients, step-by-step instructions, tips, and the full recipe card below.
Why You’ll Love This Recipe
Ingredients You’ll Need
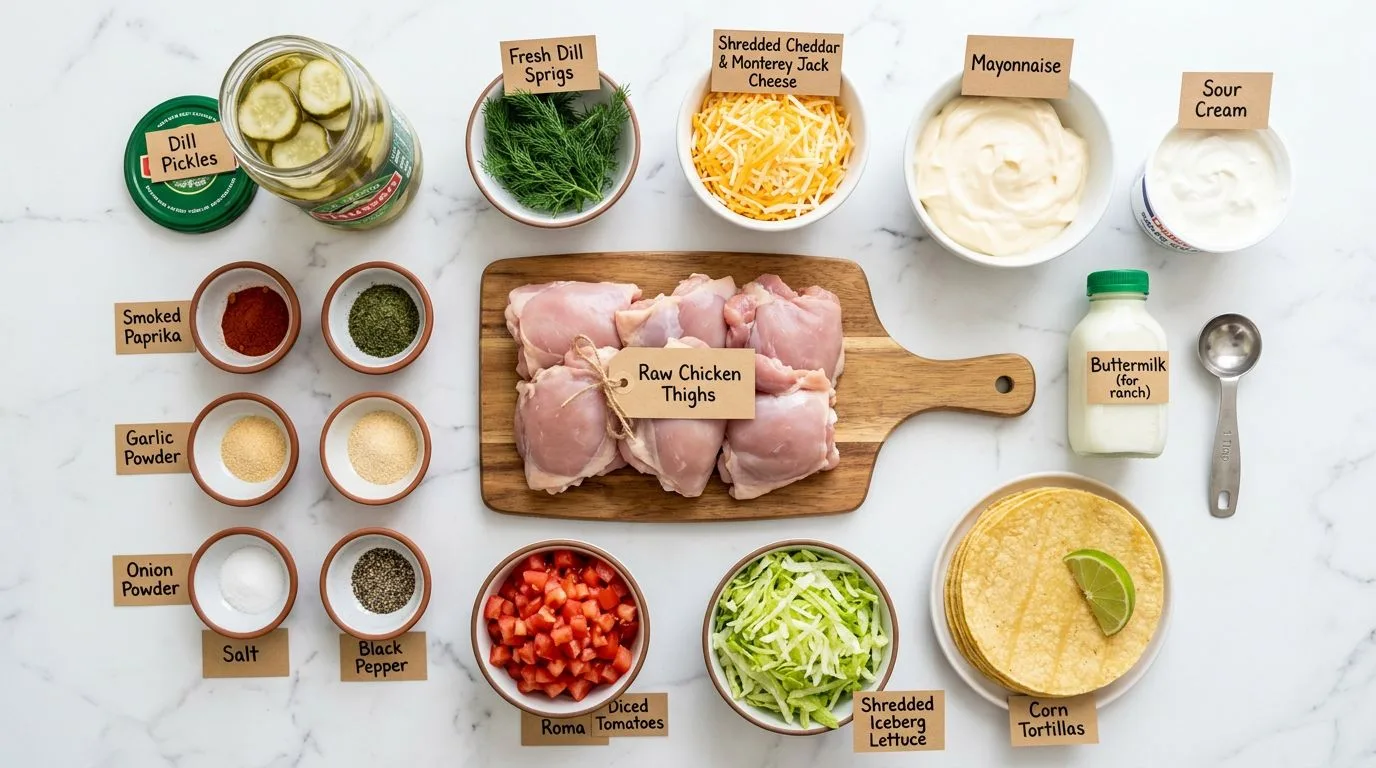
Here is everything you need to make Dill Pickle Ranch Smash Chicken Tacos. Full quantities are in the recipe card below.
- For the Smash Chicken:
- 1.5 lbs boneless, skinless chicken thighs
- 1 tbsp olive oil
- 1 tsp garlic powder
- 1 tsp onion powder
- 1 tsp dried dill
- 1 tsp smoked paprika
- ½ tsp salt
- ½ tsp black pepper
- 1 oz ranch seasoning packet (or 2 tbsp homemade ranch seasoning)
- For the Ranch Drizzle:
- ½ cup sour cream
- 3 tbsp mayonnaise
- 2 tbsp buttermilk (or regular milk)
- 1 tbsp fresh dill, chopped (or 1 tsp dried)
- 1 tsp garlic powder
- 1 tsp onion powder
- 1 tbsp fresh lemon juice
- Salt and pepper to taste
- For Assembly:
- 8 small flour tortillas (6-inch)
- ½ cup dill pickle slices (sandwich-style)
- 1 cup shredded iceberg lettuce
- ½ cup diced white onion
- 2 tbsp fresh dill for garnish
Feel free to swap ingredients based on dietary needs or what you have on hand. Most substitutions work well in this recipe without affecting the final result significantly.
Always taste and adjust seasoning at the end — every ingredient varies slightly in intensity.
How to Choose the Best Ingredients
The quality of your ingredients directly impacts the final dish. For Dill Pickle Ranch Smash Chicken Tacos, look for the freshest produce available and don’t skip on the key flavoring ingredients — they make all the difference between a good dish and an unforgettable one.
When shopping, prioritize fresh over pre-packaged where possible. Fresh herbs, quality proteins, and ripe produce will elevate the final result considerably compared to their processed or out-of-season alternatives.
How to Make Dill Pickle Ranch Smash Chicken Tacos
Follow these steps for perfect results every time. Full details including exact quantities are in the recipe card at the bottom of this post.
-
1
Step 1 — Make the Ranch Drizzle In a small bowl, whisk together sour cream, mayonnaise, buttermilk, fresh dill, garlic powder, onion powder, and lemon juice until smooth. Season with salt and pepper to taste. Refrigerate until ready to use.
-
2
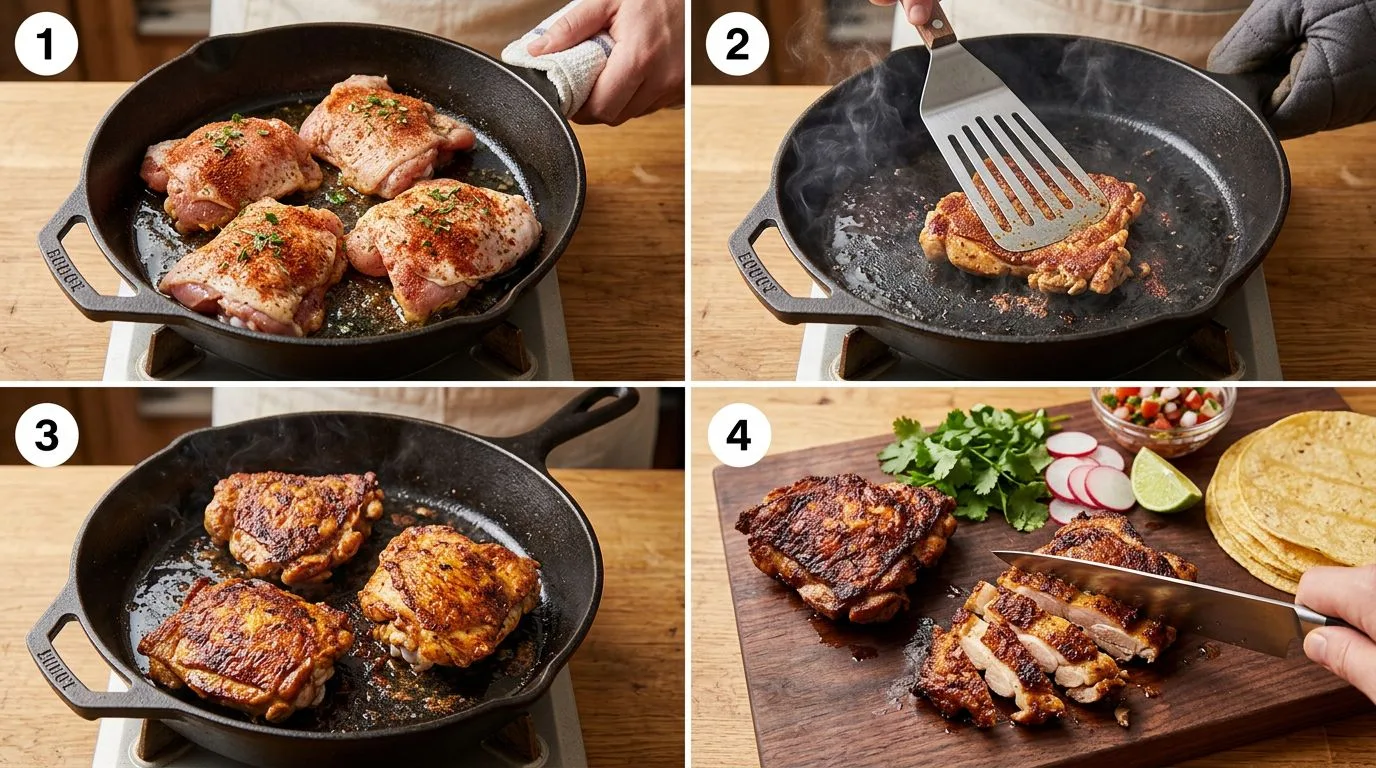
Step 2 — Season the Chicken Pat chicken thighs dry with paper towels. In a large bowl, toss with olive oil, garlic powder, onion powder, dried dill, smoked paprika, salt, pepper, and ranch seasoning until fully coated.
-
3
Step 3 — Smash and Cook the Chicken Heat a large cast-iron skillet or heavy pan over medium-high heat. Add chicken thighs and immediately press down firmly with a heavy spatula or meat press to flatten to about ½-inch thickness. Cook 4–5 minutes undisturbed until the edges are golden and crispy.
-
4
Step 4 — Flip and Finish Flip each thigh and cook another 3–4 minutes until cooked through (internal temp 165°F) with crispy edges on both sides. Transfer to a cutting board and let rest 2 minutes, then slice or roughly chop.
-
5
Step 5 — Warm the Tortillas Heat tortillas one at a time in a dry skillet over medium heat for 30 seconds per side, or char briefly over a gas flame, until warm and slightly pliable with light golden spots.
-
6
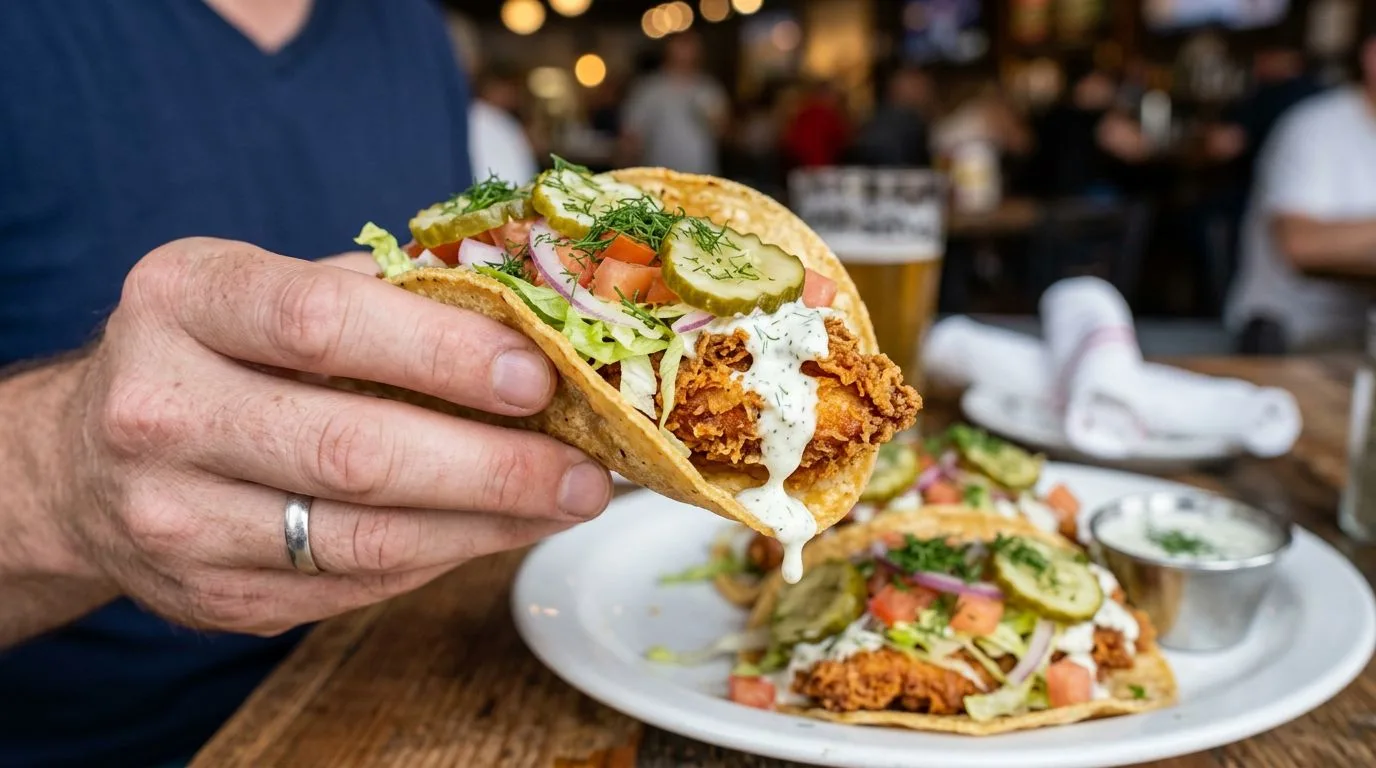
Step 6 — Assemble the Tacos Lay a tortilla flat and add a layer of shredded lettuce. Top with chopped smash chicken, 3–4 dill pickle slices, and diced white onion. Drizzle generously with ranch sauce.
-
7
Step 7 — Garnish and Serve Finish with a sprinkle of fresh dill. Serve immediately with extra ranch drizzle and pickle slices on the side.
Read the recipe all the way through before you start — it helps you anticipate each step and have everything prepped and ready.
Don’t rush the cooking time. Patience at each stage builds the depth of flavor that makes this recipe special.
Why This Recipe Works
Every step in this recipe is deliberate. The combination of technique and timing creates layers of flavor that build on each other. The seasoning approach ensures every component is properly seasoned rather than relying on salt at the end. The cooking method locks in moisture while developing the exterior texture that makes this dish so satisfying.
The key is following the steps in order and not rushing any stage. Each element of this recipe was tested to work in harmony with the others — skipping or shortcutting any step will affect the final result.
Best Side Dishes to Serve With Dill Pickle Ranch Smash Chicken Tacos
Variations to Try
- Dairy-Free: Substitute any dairy ingredients with high-quality plant-based alternatives.
- Gluten-Free: Use certified gluten-free versions of any sauces or seasonings.
- Spicy Version: Add red pepper flakes or a dash of hot sauce to taste.
- Make-Ahead: Prepare components up to 24 hours ahead and assemble before serving.
- Slow Cooker: Adapt for the slow cooker — cook on LOW for 6–8 hours for even deeper flavor.
Storage, Meal Prep & Reheating
Storing Leftovers
Store leftovers in an airtight container in the refrigerator for up to 4 days. The flavors often deepen overnight making leftovers just as satisfying as the fresh dish.
Freezing
This recipe freezes well for up to 3 months. Cool completely before transferring to freezer-safe containers. Thaw overnight in the refrigerator before reheating.
Reheating
Reheat gently on the stovetop over medium-low heat or in the microwave covered with a damp paper towel. Add a splash of water or broth if needed to restore moisture. Avoid overheating — gentle and slow preserves the texture best.
Common Mistakes to Avoid
- Skipping the prep work. Having everything measured and ready before you start makes the cooking process smooth and prevents overcooking while you search for ingredients.
- Rushing the cooking time. Each step has a purpose. Trust the timing and resist the urge to speed things up.
- Not tasting as you go. Adjust seasoning at every stage — waiting until the end means you’ve missed multiple opportunities to build flavor.
- Overcrowding the pan. Cook in batches if needed. Overcrowding creates steam rather than the browning and caramelization that builds flavor.
Nutritional Information
Per serving (based on 4 servings):
Nutritional values are estimates and will vary based on specific ingredients and portion sizes used.
Serving & Presentation Tips
- Garnish at the last moment. Fresh herbs and finishing elements go on right before serving for maximum visual impact and freshness.
- Warm your serving dishes. A warm plate keeps the food at the right temperature longer — simply run hot water over the plate for 30 seconds and dry before plating.
- Less is more. Clean, intentional plating always looks more impressive than an overcrowded plate.
Frequently Asked Questions
Can I make Dill Pickle Ranch Smash Chicken Tacos ahead of time?
Yes — this dish actually benefits from being made ahead as the flavors have time to meld and deepen. Prepare up to 24 hours ahead, refrigerate, and reheat gently before serving.
Can I freeze Dill Pickle Ranch Smash Chicken Tacos?
Absolutely. Cool completely, transfer to freezer-safe containers, and freeze for up to 3 months. Thaw overnight in the refrigerator and reheat gently on the stovetop.
Is Dill Pickle Ranch Smash Chicken Tacos gluten-free?
It can be made gluten-free with simple substitutions — use certified gluten-free versions of any sauces or seasonings called for in the recipe.
How many servings does this recipe make?
This recipe makes 4 generous servings. It scales easily — simply double or halve the ingredients proportionally.
You Might Also Love
Final Thoughts
This Dill Pickle Ranch Smash Chicken Tacos has become a go-to for good reason — it delivers on every level. The flavor is deep and satisfying, the technique is straightforward, and the results are consistently impressive whether you’re cooking for yourself on a Tuesday or feeding a table full of people on a weekend.
Once you’ve made it the first time, you’ll understand exactly why it works so well. The combination of well-seasoned ingredients, proper technique, and a little patience produces something genuinely greater than the sum of its parts.
Make it this week and let us know how it turned out — leave a comment below and tell us what you served alongside. We read every single one. 🍽️
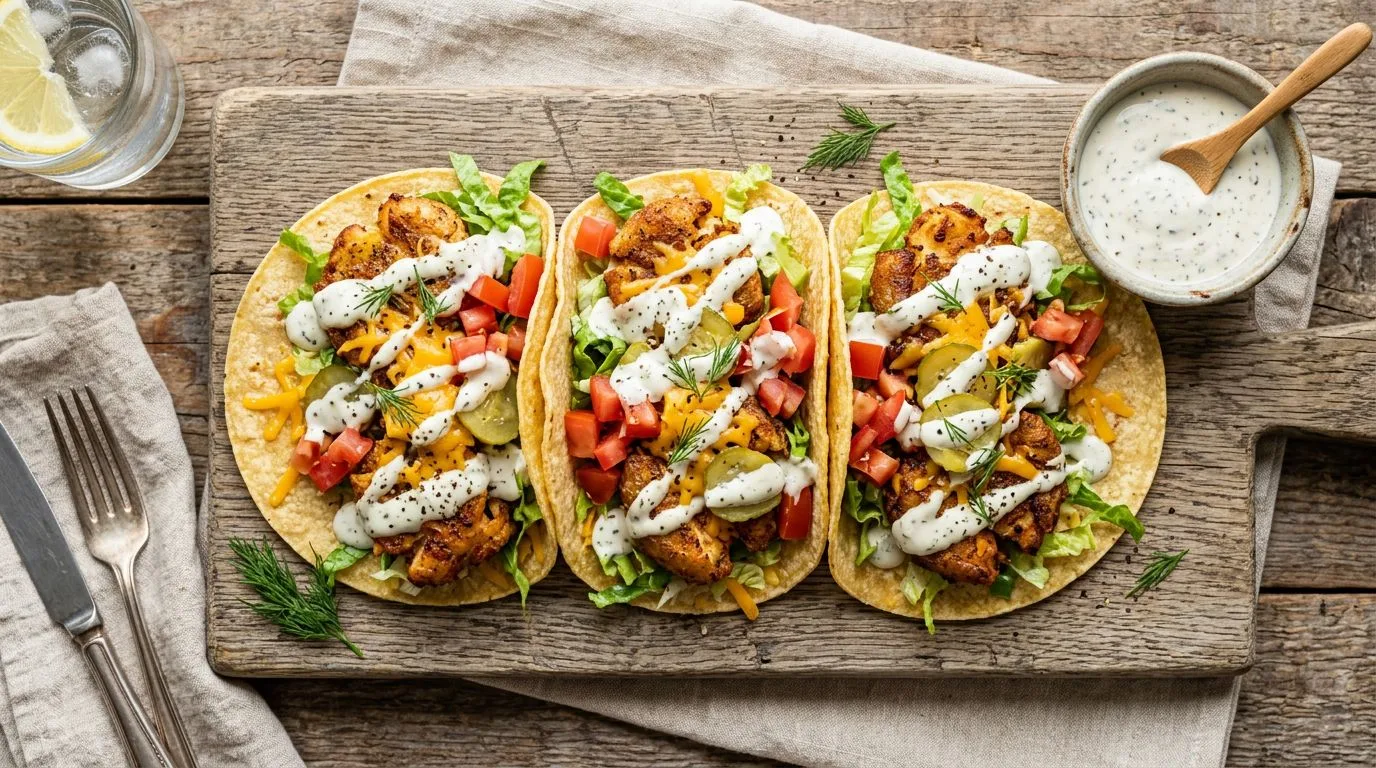
Dill Pickle Ranch Smash Chicken Tacos
Dill Pickle Ranch Smash Chicken Tacos are the ultimate flavor-bomb weeknight dinner — juicy smashed chicken thighs seasoned with ranch, topped with tangy dill pickle slices, and tucked into a warm flour tortilla. The combination of crispy-edged chicken, creamy ranch drizzle, and briny pickle punch is unexpected and completely addictive. These come together in under 30 minutes and are guaranteed to become a new household obsession.
Ingredients
- For the Smash Chicken:
- 1.5 lbs boneless, skinless chicken thighs
- 1 tbsp olive oil
- 1 tsp garlic powder
- 1 tsp onion powder
- 1 tsp dried dill
- 1 tsp smoked paprika
- ½ tsp salt
- ½ tsp black pepper
- 1 oz ranch seasoning packet (or 2 tbsp homemade ranch seasoning)
- For the Ranch Drizzle:
- ½ cup sour cream
- 3 tbsp mayonnaise
- 2 tbsp buttermilk (or regular milk)
- 1 tbsp fresh dill, chopped (or 1 tsp dried)
- 1 tsp garlic powder
- 1 tsp onion powder
- 1 tbsp fresh lemon juice
- Salt and pepper to taste
- For Assembly:
- 8 small flour tortillas (6-inch)
- ½ cup dill pickle slices (sandwich-style)
- 1 cup shredded iceberg lettuce
- ½ cup diced white onion
- 2 tbsp fresh dill for garnish
Instructions
-
1
Step 1 — Make the Ranch Drizzle In a small bowl, whisk together sour cream, mayonnaise, buttermilk, fresh dill, garlic powder, onion powder, and lemon juice until smooth. Season with salt and pepper to taste. Refrigerate until ready to use.
-
2
Step 2 — Season the Chicken Pat chicken thighs dry with paper towels. In a large bowl, toss with olive oil, garlic powder, onion powder, dried dill, smoked paprika, salt, pepper, and ranch seasoning until fully coated.
-
3
Step 3 — Smash and Cook the Chicken Heat a large cast-iron skillet or heavy pan over medium-high heat. Add chicken thighs and immediately press down firmly with a heavy spatula or meat press to flatten to about ½-inch thickness. Cook 4–5 minutes undisturbed until the edges are golden and crispy.
-
4
Step 4 — Flip and Finish Flip each thigh and cook another 3–4 minutes until cooked through (internal temp 165°F) with crispy edges on both sides. Transfer to a cutting board and let rest 2 minutes, then slice or roughly chop.
-
5
Step 5 — Warm the Tortillas Heat tortillas one at a time in a dry skillet over medium heat for 30 seconds per side, or char briefly over a gas flame, until warm and slightly pliable with light golden spots.
-
6
Step 6 — Assemble the Tacos Lay a tortilla flat and add a layer of shredded lettuce. Top with chopped smash chicken, 3–4 dill pickle slices, and diced white onion. Drizzle generously with ranch sauce.
-
7
Step 7 — Garnish and Serve Finish with a sprinkle of fresh dill. Serve immediately with extra ranch drizzle and pickle slices on the side.
Read the full recipe before you start. Having everything prepped and ready makes the process smooth and the result consistent.
Taste and adjust seasoning at every stage — this is the single most important habit you can develop as a cook.
